| Author | version | Date |
|---|---|---|
| Manoj Iyer | 1.0 | Friday June 30, 2017 |
On the MAAS server you need to enable the latest centriq PPA (for example release "Ubuntu RC 2017-06")
  $ sudo add-apt-repository ppa:centriq-team/17.06.rc
  $ sudo apt-get update
Please make sure you enable the appropriate PPA for Ubuntu UOSE release mentioned in the release notes provided to you.
  ubuntu@amberwing-maas:~$ apt policy maas
  maas:
    Installed: 2.2.0+bzr6054-0ubuntu3+build.4
    Candidate: 2.2.0+bzr6054-0ubuntu3+build.4
    Version table:
   *** 2.2.0+bzr6054-0ubuntu3+build.4 500
          500 http://ppa.launchpad.net/centriq-team/17.06.rc/ubuntu xenial/main amd64 Packages
          100 /var/lib/dpkg/status
       2.1.5+bzr5596-0ubuntu1~16.04.1 500
          500 http://archive.ubuntu.com/ubuntu xenial-updates/main amd64 Packages
       2.0.0~beta3+bzr4941-0ubuntu1 500
          500 http://archive.ubuntu.com/ubuntu xenial/main amd64 Packages
  ubuntu@amberwing-maas:~$
ubuntu@ubuntu:~$ sudo apt-get install maas
  ubuntu@ubuntu:~$ sudo maas-region createadmin
  Username: ubuntu
  Password: ubuntu
  Again: ubuntu
  Email: ubuntu@local
  Import SSH keys [] (lp:user-id or gh:user-id): lp:manjo
SSH keys import is optional here, you can leave it blank and add those keys later
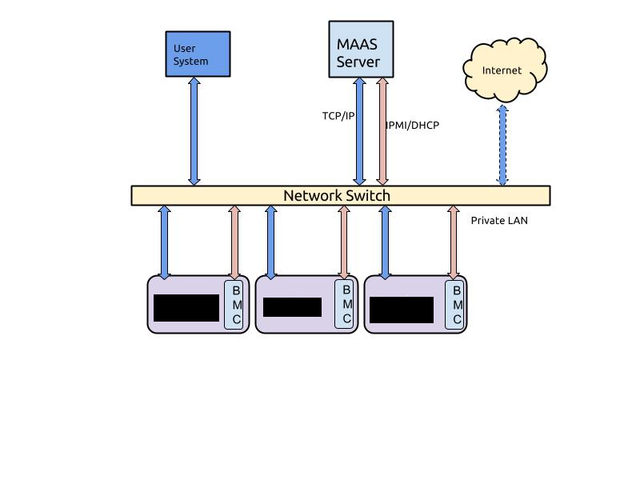
MAAS enlists and commissions nodes through the use of its own DHCP server running on the untagged VLAN. Please refer the MAAS documentation on DHCP configuration available online. To enable MAAS-managed DHCP click on the Subnets tab.

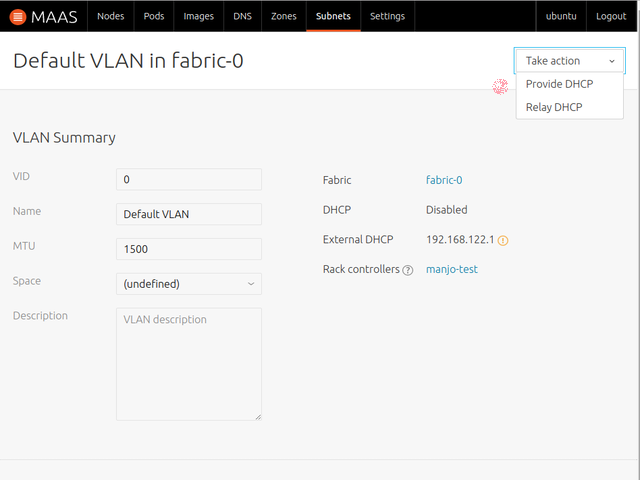
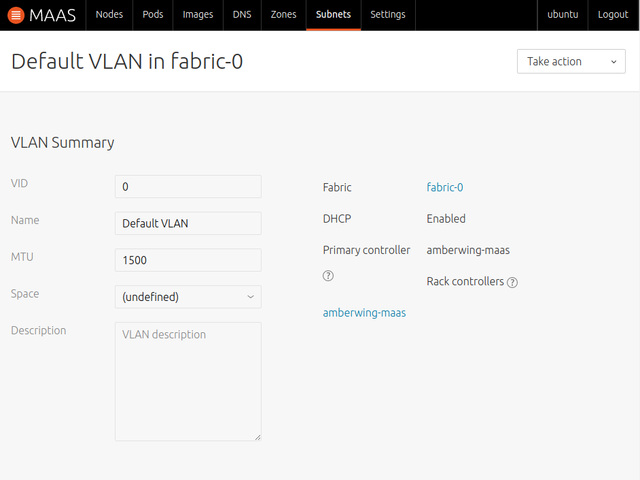
Click on untagged under VLAN, and then click on Take Action drop down menu and select Provide DHCP
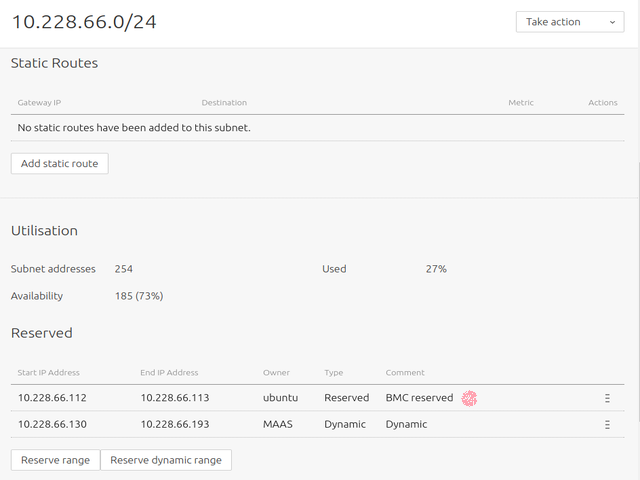
MAAS UI will give you the option to select your DHCP ranges. You will need to reserve the range of IP address allocated as static IPs to the BMCs by clicking on the IP address in the Subnets tab under VLAN.
Under Settings tab. Enter the 'Upstream DNS used to resolve domains not managed by this MAAS'. You need to this to be able to resolve ports.ubuntu.com etc.
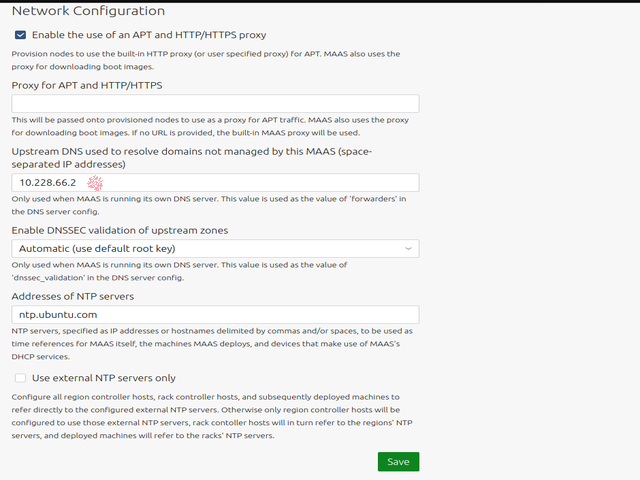
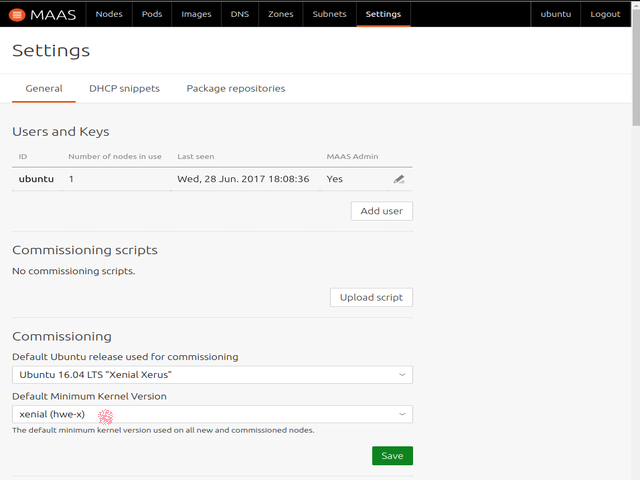
Also, set the kernel used for commissioning, you must select the xenial hwe-x kernel to commission the QDF2400 system.
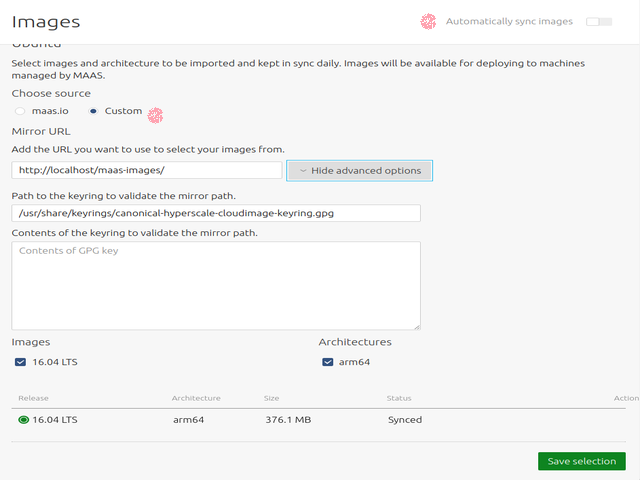
Please read the MAAS documentation on MAAS images available online. Custom images for QDF2400 and local boot image source (local simplestream) was already installed on your MAAS server when you installed MAAS from the Centriq PPA. You will need to import this custom image (The images might have already been imported when you installed MAAS, but it is repeated here for completeness).
Under Images tab, make sure the radio button Custom is selected, and the page displays the information as shown below. If this looks correct click on Save Selection. On the right hand top corner you will see Automatically sync images, disable this option if you are using custom images.
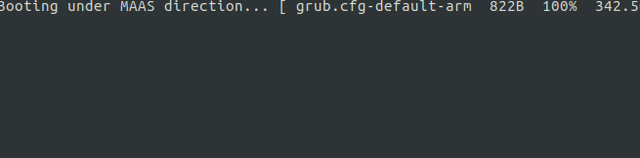
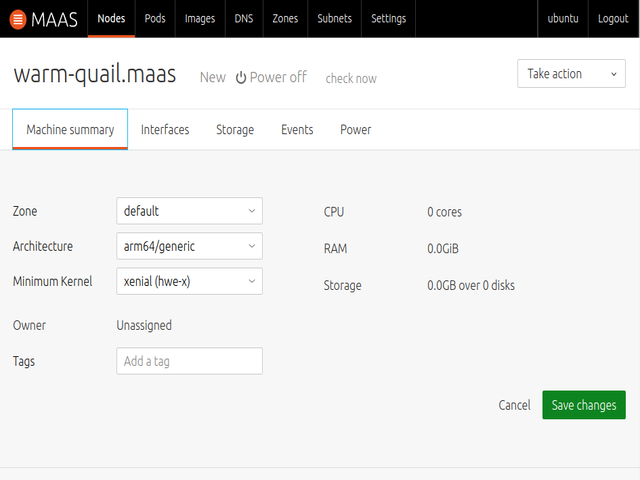
Your QDF2400 system should already be setup to PXE boot from the MAAS server. To enlist the QDF2400 system using ipmi commands, power on the system and allow it to boot from the network. Please read the MAAS documentation on MAAS enlistment available online. After the system is enlisted it will be listed under the Nodes tab in the MAAS web UI. Note, 'Power Type' will be unknown at this point, you will need to set the power type next so that you can power control the node from the MAAS UI. Also, you can change the name of the node, if you desire, on the web UI.
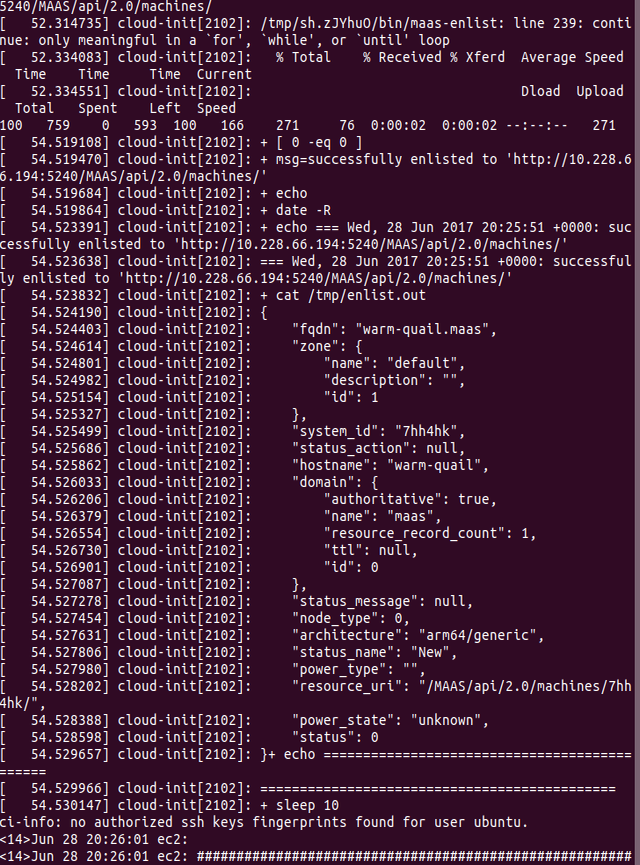
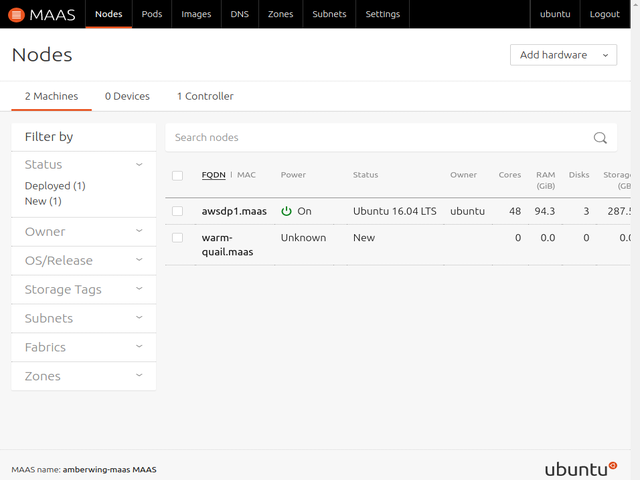
Note that MAAS does not have any information about CPU, RAM, Storage etc. This will be gathered during the 'Commission' phase, coming up next.
For the newly enlisted system, under the Power tab you will need to update the IPMI power parameters for the QDF2400 system. Please read the MAAS documentation on BMC Power available online.
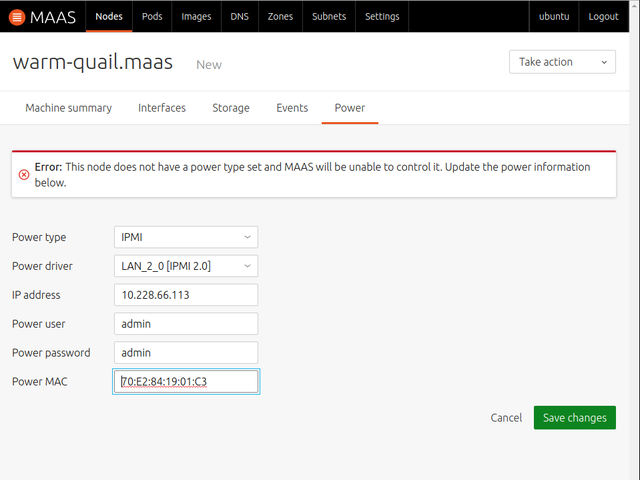
Enlistment of the new node is now complete, and the new QDF2400 system is ready to be power controlled from the MAAS web UI. In the next phase: 'Commission', MAAS will gather hardware information about the newly enlisted node.
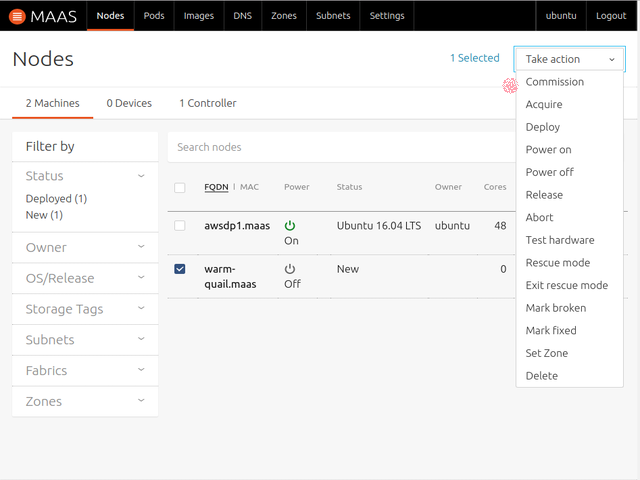
Commissioning allows MAAS to determine the hardware information about the newly added node. Please read the MAAS documentation on Commissioning a node available online, and refer to the online documentation, section: 'Post-commission configuration' after the node is commissioned. To start commissioning, select the node you want to commission from the Nodes tab and under Take Action select commission.
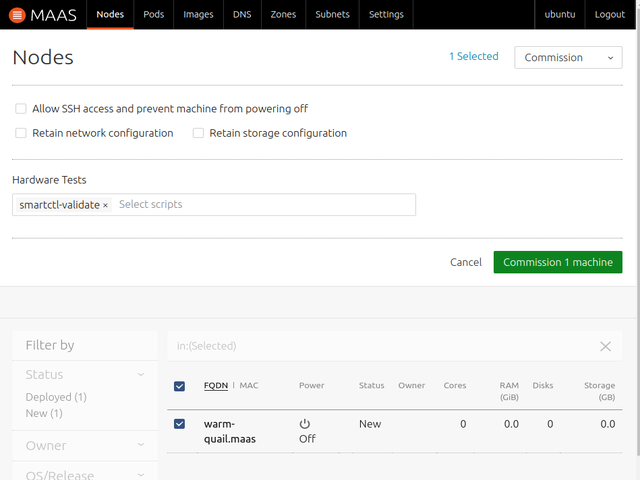
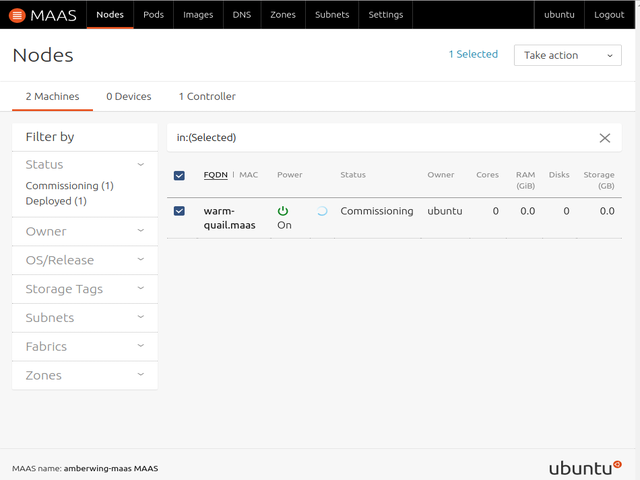
And, confirm by clicking on the Commission machine button. You can ignore the additional options like Retain network configuration etc.
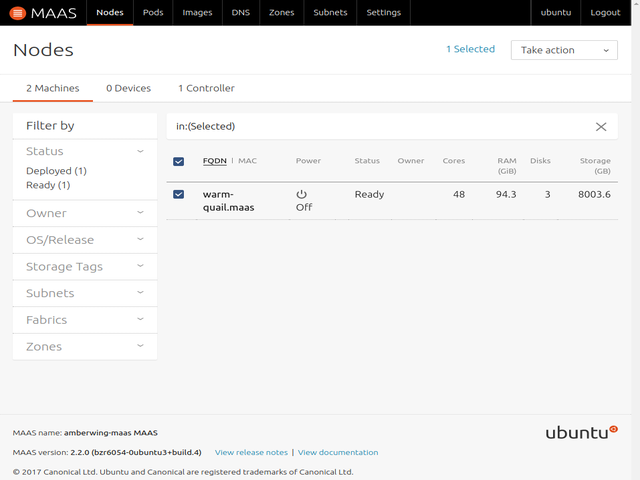
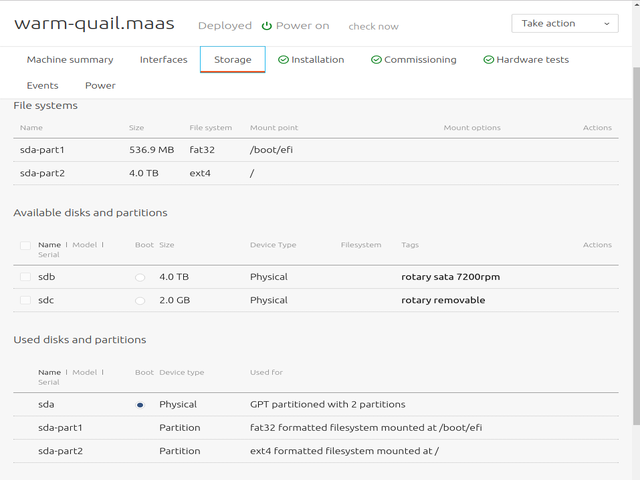
After commissioning is done your node 'Status' will be in the 'Ready' state, the node is ready to be deployed with Ubuntu. Optionally, you may want to remove any USB or SD card targets from the list of storage options. MAAS will use sda as its primary install target. Please read the MAAS documentation on storage available online.
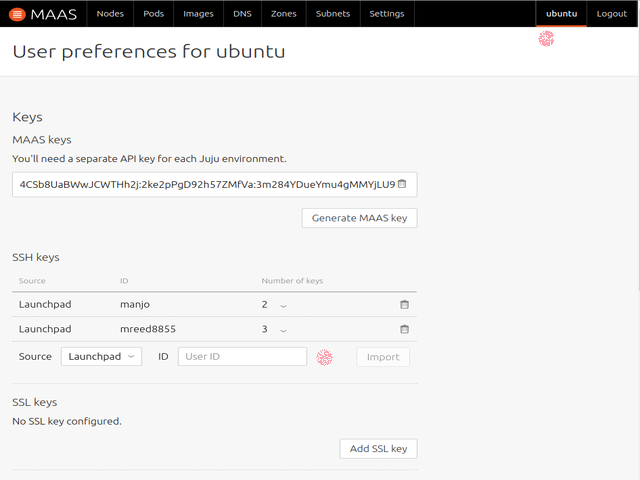
Before you can deploy the node with Ubuntu, or any services, you will need to add your SSH public key to MAAS web UI (so that you can ssh to your node for example). Navigate to admin user's (Ubuntu in this example) page by clicking on the Ubuntu icon on the top right hand corner. Here you can import the SSH key stored in Launchpad.net, or add your keys manually by clicking on Add SSL key.
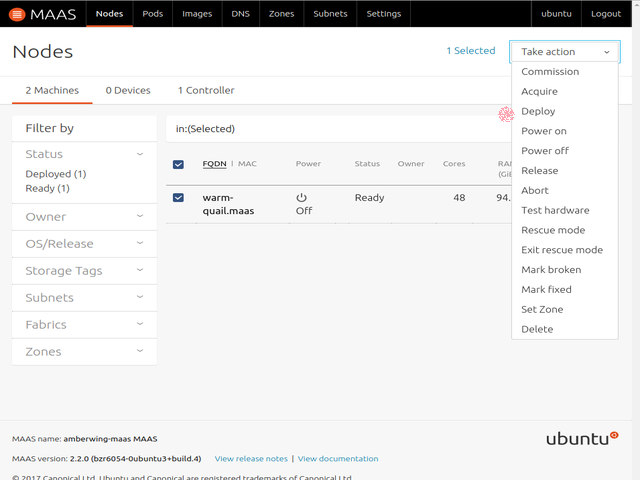
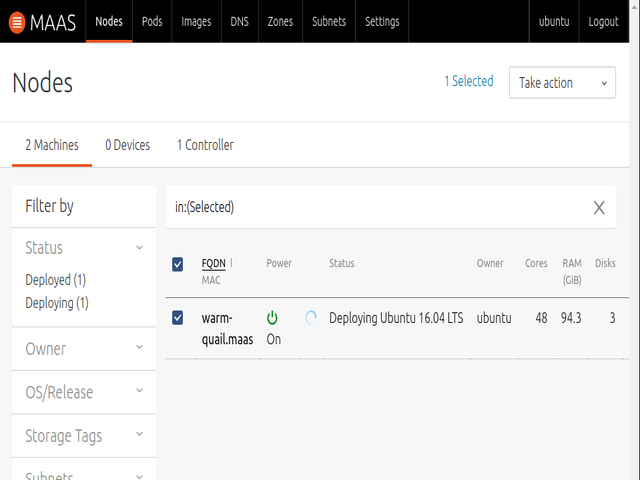
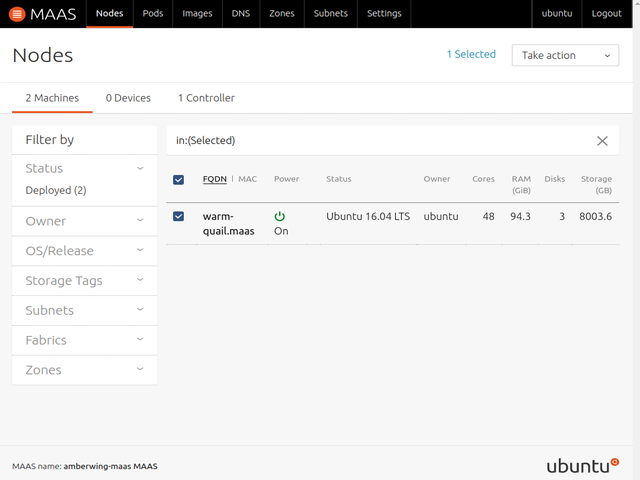
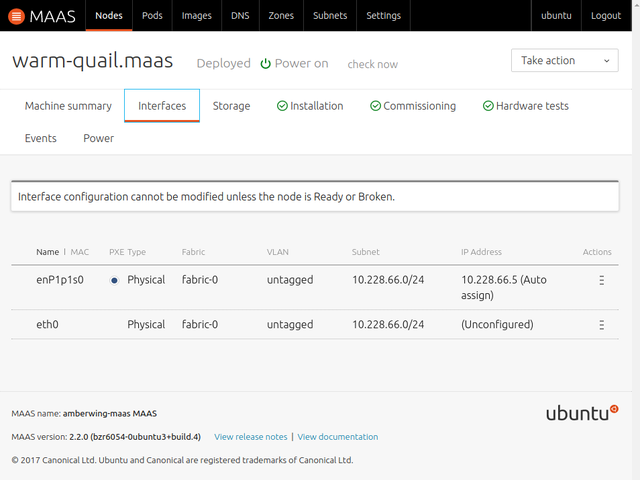
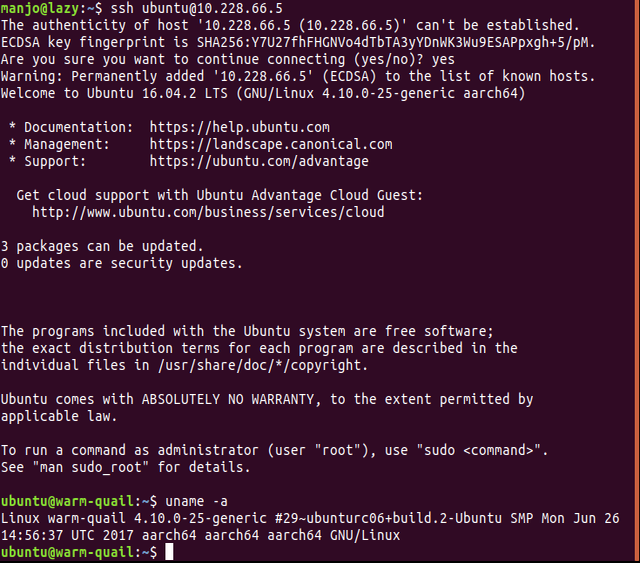
Deploying the node is similar to commission. You can select the node that has been successfully commissioned ("Status" of the node will be "Ready"), click on Take Action and select Deploy. After the node has successfully deployed, you can ssh to this node by ip address. You can get the ip information by clicking on the name of the node, and click on the Interfaces tab. Please read the MAAS documentation on deployment available online.
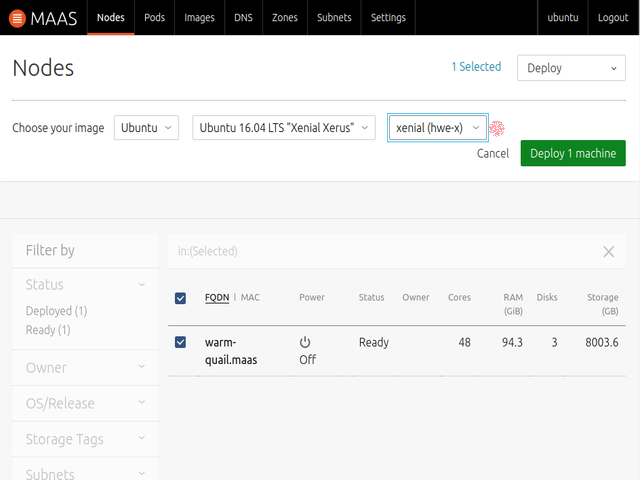
You must select the hwe-x kernel for deployments.
Note, login from the console is diabled, you can only SSH to the nodes.
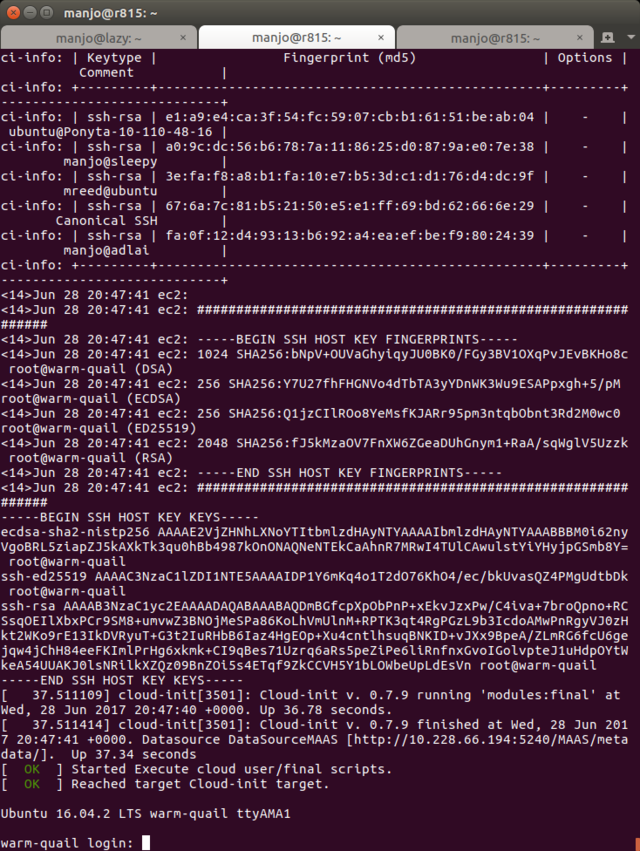
This is for your information only. Nothing to do here.
You would always SSH as 'ubuntu' user, MAAS will use your SSH credentials to authenticate, so make sure you have the SSH keys (you already uploaded to MAAS) on the system your are SSHing from.
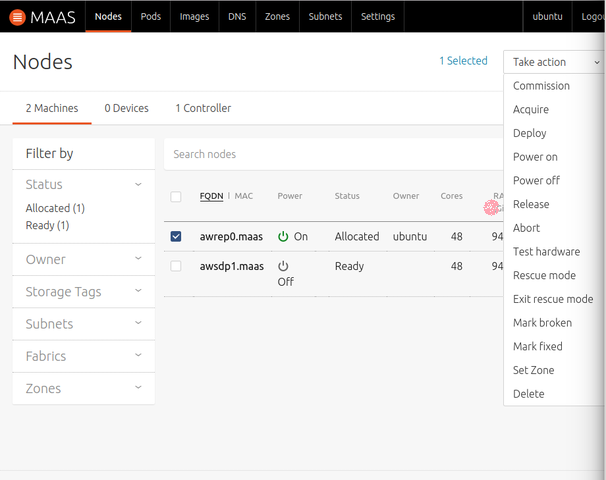
To release a node back into the pool, select the node in the Nodes page and in Take Action select Release. This will 'release' that node back to the pool, power off the system and move it to Ready state. To use that node again, it will need to be deployed again.
Please refer to Documentation on using Juju with MAAS. Before you can use juju to deploy services to MAAS provider, make sure your nodes in MAAS are in the ready state, ie they are commissioned and ready for deployment. If you have deployed any nodes already using the MAAS UI you should select those nodes and Release those nodes from the Take Action menu.
To install juju follow these steps add-apt-repository command is available in the package software-properties-common:
  $ sudo add-apt-repository ppa:juju/devel
  $ sudo apt update
  $ sudo apt install juju-2.0